Porch Renovation

So, I know, I know…I haven’t posted much lately, but with the New Year comes my New Year’s resolution:  to blog more!  I thought I would start with details about our porch renovation.  First off, the porch is probably the favorite part of our home.  I always dreamed of having a home with a porch and when we started our home buying process that was at the top of the list of things we wanted.  After viewing the house for the first time, the porch definitely sealed the deal.  We absolutely love our porch and spent this past summer and fall relaxing out there.  The porch adds a lot of curb appeal to our home so it was also at the top of the list of our renovations.

You may remember from one of my previous posts that our porch looked like this:

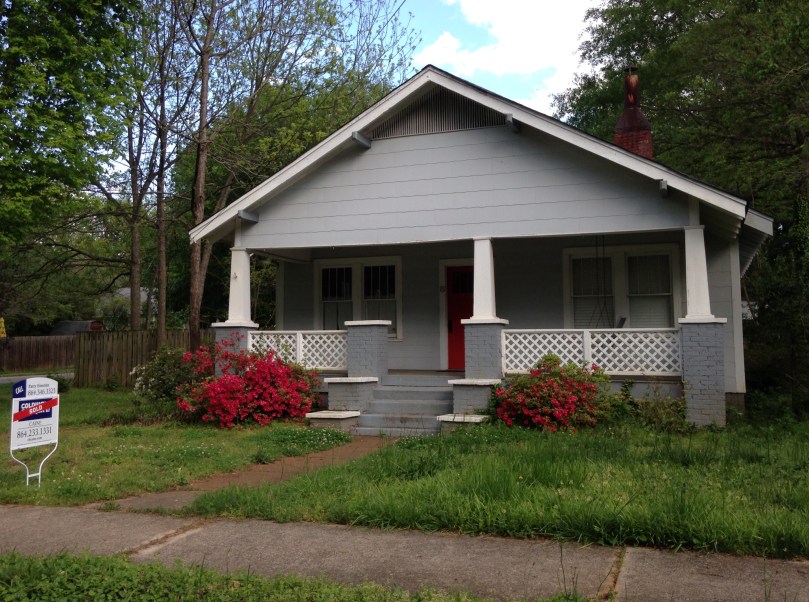
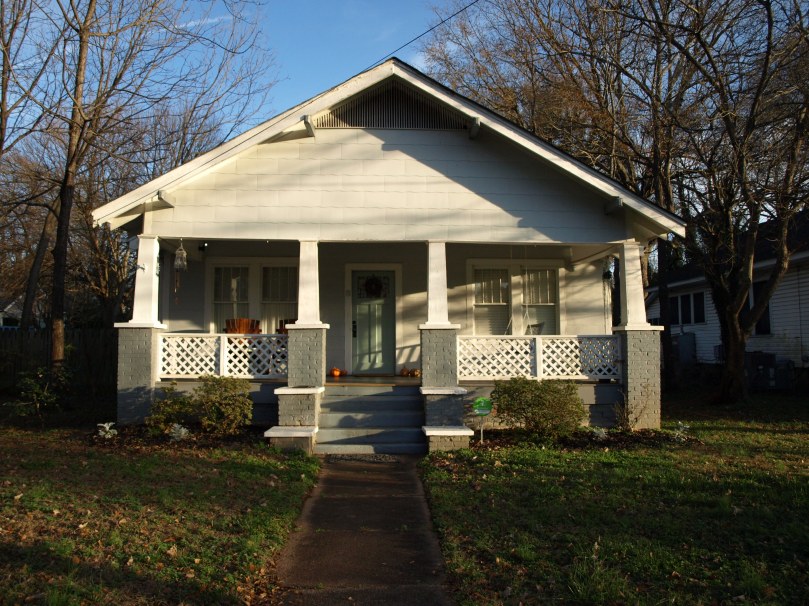
One of our columns was missing which threw off the symmetry of the house.   We knew adding a  column would really make the porch feel complete.  Here is a before and after photo:

beforeafter porch

Sooo much better, right?

And no porch is complete without a few rocking chairs, am I right?  Well, my brother-in-law, Justin, surprised us with two rocking chairs as a house warming gift.  I bought some cushions for them to add some color to the porch.  We also got a wind chime to hang on the porch.  It may sound silly but I was so happy about the wind chime.  I just love the sound it makes and it just helps make our home feel “homey.”

IMG_5070

We also added a new chain to our porch swing.  My Dad helped us out with that.  Here is what it looked like before with it’s rusty chain:

IMG_2402

We added a new white chain and it was good as new.  These next two photos are outtakes from our Christmas card this year, but they are good ones of the updated swing and our rocking chairs.

OLYMPUS DIGITAL CAMERA

OLYMPUS DIGITAL CAMERA

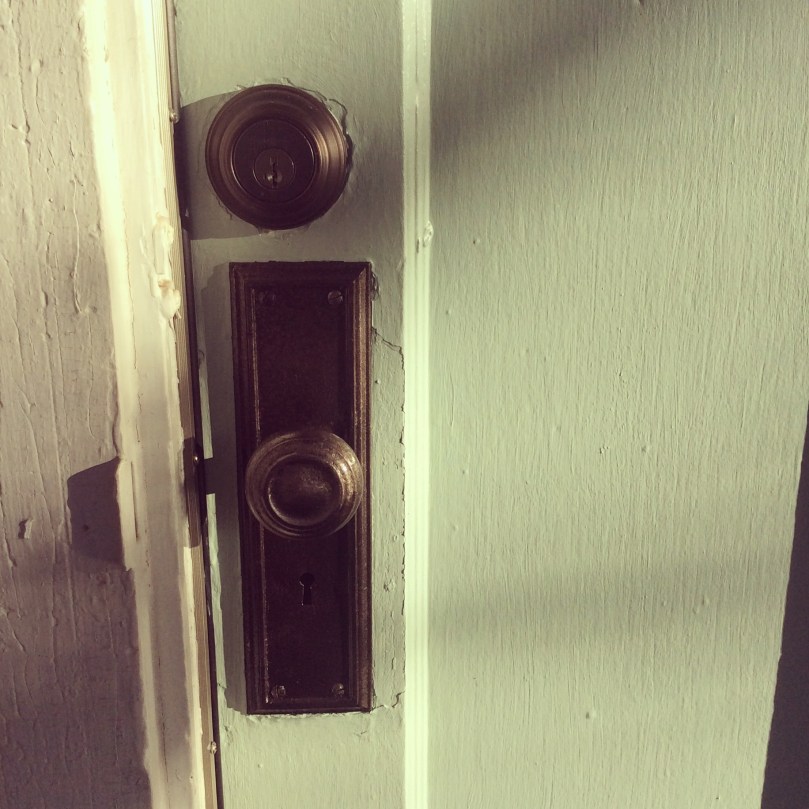
One other thing I really wanted to do was paint our door.  We didn’t mind the red on the door, but I had my heart set on painting the door “Wythe Blue” by Benjamin Moore.  Every house we looked at during our house hunt I kept telling James that no matter what house we bought, I wanted to paint the front door that color.  I did two coats on the door and then we spray painted the door knob since it needed a little touch up.  I am so happy with how it turned out!

IMG_4328

IMG_5071

And after searching ages for the perfect door mat, I finally found this on from West Elm (sorry folks, but they are currently sold out of this option).

OLYMPUS DIGITAL CAMERA

It’s definitely beginning to feel more like home!

OLYMPUS DIGITAL CAMERA

So there you have it, our renovated porch.  We still eventually want to paint the exterior of the house and add some landscaping but we are very happy with our progress so far.  Here’s to the New Year!

DIY No Sew Curtains

Our home has high ceilings with a lot of windows so outfitting all the windows with curtains is a task in and of itself.  Luckily, the previous owners left the window blinds in one of the guest rooms and the master and also left most of the curtains in the living room and kitchen.

Curtains we inherited from the previous owners

Although the curtains aren’t really our style, we were really glad to have them because it saved us spending a lot of money up front just on curtains.  Two windows still in need of curtains were in our dining room area.  Since we have tall windows throughout the house, we needed curtains at least 96 inches long which are difficult to find in the store.  We basically decided we would need to order curtains online but just could not find something we liked that wasn’t super expensive.  In the end, Pinterest came to the rescue with tons of links to DIY curtain ideas.  Even though I can sew, I do not have a sewing machine and wanted a quick DIY project to complete.  I was skeptical about doing a no sew project, but I can say I am happy with the results.  I ended up combining different tutorials from Pinterest to make these no sew curtain panels.

Here are the materials you will need:

  • Fabric (I ended up ordering 6 yards)
  • 1 Roll of Stitch Witchery (I purchased mine from JoAnn’s Fabrics)
  • Iron and Ironing board
  • Damp Cloth
  • Quilting Pins
  • Scissors
  • Curtain Clip Rings (optional; I purchased mine from Target)
  • Curtain Rod

My first step was to choose the fabric.  I just adore all of April Rhodes‘ designs and, previously, my Mom made us some throw pillows from April’s Arizona fabric collection.  Here are some of the pillows below

image

For the curtains, we wanted something that would bring a little bit of color and warmth to the room and, since we loved the fabric for our pillows so much, we decided to use Wandering Lands from April’s Wanderer collection this time.  The perk of making your own curtains is being able to choose whatever fabric/design you want.  I ordered a few extra yards to be on the safe side.

Once the fabric arrived, I set up the ironing board and tacked down the side hems of the curtains.  I did a 1 inch hem on the sides and did a 2.5 inch hem for the top.  Even though we ended up using curtain clip rings to hang the curtains, I made the top hem big enough so if we want to insert a rod into the curtain we have the option.

image

After setting up my hem, I ironed on the stitch witchery.  The directions said to use a damp cloth and to press the iron down for 10 seconds on each side.  I believe there are other types of no sew hem methods that do not require the damp cloth but the stitch witchery was one of the cheaper options at the store.  I was skeptical about whether the stitch witchery would work or not but was pleasantly surprised with the results.  There were only a few areas I needed to go over more than once and my advice is to let it cool down all the way before checking to make sure it is secure and, although a little tedious, make sure you iron both sides of the fabric.

image

After I finished ironing all the hems, I went ahead and ironed the curtains too just to get some wrinkles out.  Then, they were ready to go!  I attached the curtain clips and here is the final result.

image

Also, since I had a few extra yards left over, I made a little curtain for our front door too.

image

That’s it!  Super simple.  I’m very happy with the outcome of this project and will probably never buy curtains again. I did not line the back of these because I wanted the area to still get a lot of light, but it would probably be pretty easy if  you are interested in a thicker curtain.  The best part?  These curtains cost less than the ones we would have purchased online and we have the custom look we wanted!

Living Room Renovation: Part 2

As I mentioned yesterday, our living room and hallway floor renovation did not go as smoothly or as quickly as we planned.  Since our floor reno came to a dead halt, I had some time and decided to tackle our fireplace renovation.  Our fireplace came to us with an ugly faux stone façade which was hiding the brick underneath.  Our home is a craftsman home and the stone did not fit the character. Here’s a look at the fireplace the day we viewed the home for the first time:

MLS listing photograph

Luckily for us, the person who placed the stone on the fireplace did a pretty lousy job and it basically came right off, but once again we weren’t sure what we would find underneath…

Getting ready to chisel away the stone
Yikes, again!

So obliviously there was some fire damage to the bricks at some point in time.  In case you hadn’t guessed it from this photo, our fireplace is not a working fireplace.  My next step here was to clean the fireplace as well as I could.  Then, I put my experience from repointing at Fort Pulsaski in the summer of 2011 to the test and repointed our fireplace.  My original plan was to repoint the entire fireplace but that did not last long. Chiseling out old mortar is a very messy process especially inside and the old mortar was like soot and got everywhere!  James convinced me to only do what was 100% necessary.  Here is what it looked liked after repointing:

imageIt still looked pretty scary, but got much better after I primed it.

imageAround this time, we thankfully made progress on the floor.  Our realtor, Gina Calvin’s husband and son, John and Ben Calvin, have a renovation business and were able to help get us out of our floor predicament and completed the floor install for us.  We were sooo grateful for their help and they did a fantastic job installing the new pieces of wood floor.

Here is what the floor looked like after the new pieces were installed.image

So now that we had our install completed we were able to have the floors sanded and stained.  In order to complete this process we had to be out of the home for basically a week.

We had a couple of weeks in between the time of the floor install and sanding so we decided to go ahead and paint our living room.  The previous color was a blue shade.  We knew we wanted to paint the living room a grey color and after much debate decided to go with Stonington Grey by Benjamin Moore.  Let me just say Benjamin Moore may be more on the expensive side as far as paint goes but it is definitely worth every penny!  The paint lasts forever and a little goes a long way.  My dad came to help us paint and even he was very impressed with the quality of the paint.  Here is a photo of the room just after we painted and with the newly sanded floors.

imageAhh, we were looking so much better!

John was able to cut and even out some of the bricks on the fireplace for us.  Since, I didn’t repoint a lot of the mortar in that area, some of the bricks came loose, but I was able to re-stack/lay the bricks back into place with new mortar.  Here is what it looked like after I completed the process.

image

I still need to paint the hearth, but I think it looks much better than the stone.

And finally, our completed floors!

imageimage

Yay! We waited 2 weeks to move our furniture and rugs into the living room (they said one week, but we decided to wait 2 just to be on the safe side).  We finally feel more at home now that we can actually use our living room!

Living Room Renovation: Part 1

Finally, a blog post and first official update about renovations on our home! I know it has taken awhile to update but we dove into many projects right away with the home so I am just now getting a chance to write about it all.  The site design is still a work in progress, but at least it’s a start!   I planned on taking some professional photos of the before and after renovations of our home with my DSLR camera but I seem to have misplaced my charger during the move.  I’m sure it will turn up eventually, but for now iPad photos will have to do.

As a little background info, my husband, James, and I spent a long time searching for a home here in Greenville.  The market is super competitive right now and finding our perfect home was not a quick process.  Luckily, we found a wonderful Realtor, Gina Calvin, who was amazing.  We knew we wanted an older home and had our hearts set on a bungalow.  When we saw a 1925 bungalow with a beautiful front porch come on the market, we just knew it was our home.

Our home with the ‘sold’ sign. When we bought the home it only had 3 columns so we added one to the missing section (more on that in another post).

The home already had some updates including an insulated attic and upgraded HVAC system as well as several electrical and plumbing upgrades.  There were still a lot of cosmetic and other renovations we planned to tackle though to make the house our own.

We have officially been in our home for almost 4 months now (hard to believe) and we hit the ground running with renovations.  Here’s what we have completed so far:

  • Removed carpet from the living room and hallway and refinished the original hardwood floor that was underneath
  • Installed a new porch column
  • Painted (with help from my MIL and Dad) living room, bedroom, master bath, guest bath, kitchen, and laundry room
  • Removed the faux stone façade off of the living room fireplace to expose the brick underneath; cleaned, re-pointed, re-laid bricks and painted the fireplace
  • Outside landscaping (with a ton of help from my Dad): basically cleaned up the outside of the house; trimmed up trees and bushes, did some extreme weeding, planted grass seed
  • Replaced rusted chain on porch swing
  • Installed new door hardware on front and back doors and both bathroom doors
  • Cleaned off roof and gutters
  • Sanded off doors on outdoor shed and some inside doors

And that is just the beginning!  We have so much more we want to accomplish one step at a time.

Living Room Part 1:

For this first post I will just focus on our living room and hallway renovations.  On the day we closed on the house, the first thing we did was rip up the carpet in the living room.  It had to go.  The carpet was old and did not flow with the rest of the house (all of the other bedrooms already had refinished hardwood floors).

Unfortunately, the only photos I have of the old carpet are the ones I took at our first viewing of the home while the previous owners were still living there and the photos posted from the online listing:

MLS listing photograph
Pulling up the carpet

We had no idea what we would find underneath the carpet so we crossed our fingers and hoped for the best.  We knew originally there was a wall dividing the living room and dining room that was removed at some point so we were certain that would be a particular area of concern.  Well, we were correct.  Here is what was under the carpet after it was removed.

And here it is after the carpet was all gone

Yikes!

As you can see there was paint on the floor and places needing new wood installed.  The heating and air system was completely redone in 2008 so there were original air vents no longer there that had plywood placed over them.  And, of course as we expected, there was inconsistency where the wall used to be between the living and dining room.  To top it off, whoever installed the carpet wanted to make sure there was no chance of the carpet ever coming up because there were thousands of nails and staples all over the floor.  Luckily, the nails and staples were removed while we were waiting to get the new pieces of floor installed.  What we thought would be a very straightforward process:  removing the carpet, installing new wood, and refinishing the floor, in actuality became a very LONG project.  We selected a company to refinish the floors but did not know how much new floor needed to be installed until we pulled up the carpet.  When we called the floor install company, it ended up they were booked!  So we continued to call around and it seemed everyone else in Greenville was also booked for MONTHS!  We did not foresee this happening, so there we were with our floor unfinished and all of our furniture in the guest rooms (luckily we downsized by renting a one bedroom apartment before purchasing our home and also gave away a lot of our living room furniture).

So what were we to do?  Would we ever get the floor refinished?  Is it even possible that our floor could ever look good again?  Find out what happens in Part 2 of our living room renovation tomorrow!